

Samsung Galaxy S8+
Rooting Instructions
Rooting Instructions

|

|
- Modifying / replacing your phone's software may void the phone's warranty and may render phone to 'brick' status - meaning your phone will not be worth much more than a brick.
- Rooting a phone is entirely at your own risk. No one affiliated with ROMWarez is responsible for your decision to root your phone.
- Unlocking the bootloader on most phones will automatically wipe all data.
- Always backup your current Apps/Data/SMS Messages before performing any type of rooting procedure. Find these backup apps on Google Play. If you have a Google account, then backing up your contacts is unnecessary as these are on Google servers.
- Many hours have been spent compiling and creating this unique Android application. If you feel that SuperRoot-DIY has helped you, please consider a donation.

- Models: SM-G955F, SM-G955FD, SM-G955X, SM-G955N
- Download and install Samsung USB drivers to computer desktop.
- Enable Unknown Sources: Settings --> Security.
- Download TWRP Recovery to computer desktop.
- Download Odin for Samsung.
- Enable USB debugging. See below for version specific instructions.
- Enable OEM Unlock in Developer Settings.
- Power off phone.
- Boot to Download Mode: press and hold Bixby --> Volume Down --> Power Button.
- Install/Run Odin downloaded in earlier step.
- Start Odin.
- Connect USB data cable to computer USB port. Odin should connect to your phone. The text 'Added' will display in Message section of Odin window.
- Click on AP or PDA and navigate to the TWRP recovery file downloaded to computer desktop in earlier step.
- Disable Auto Reboot located in the 'Options' section of Odin Window.
- Click on 'Start' Button to flash TWRP Recovery to phone.
- Once a 'Pass' notification in Odin is displayed, TWRP Recovery is installed.

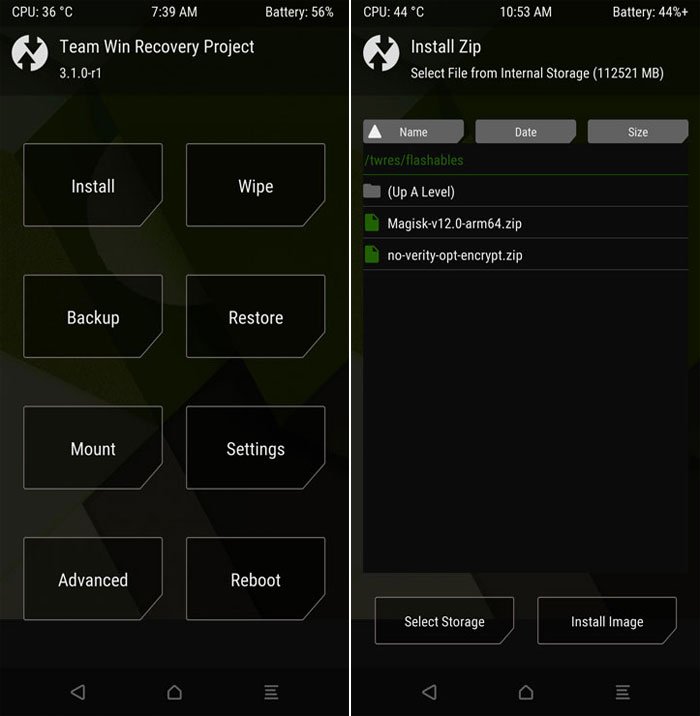
- To disable encryption/dm-crypt, install/flash “no-verity-opt-encrypt.zip”. It will disable dm-crypt and make /data encryption optional.
- Press 'Home' Button. Then tap 'Wipe' Button to wipe your /data partition which will disable encryption.
- To Root phone, To root, install/flash 'Magisk-v12.0-arm64.zip.
- Once the file is flashed for root, press the 'Reboot' Button.
- Download and install 'Root Checker' from Google Play to confirm root.
- Start RootChecker on your phone to verify root privileges. If phone is rooted, phone should display below screen shot:

- Phone is rooted!
Enabling USB Debugging:
- Go to Settings --> About Phone.
- Tap on Build Number up to 7 times.
- On 3rd tap, message will display: You are now 4 steps away from being a developer.
- After the 7th tap, a message will display: You are now a developer!
- The Developer Options will be displayed above About Phone.
- Enable Developer Settings by sliding the switch.

If you decide you would rather have an expert root your phone or you want to install a custom ROM like CyanogenMod, feel free to click the link to schedule a remote session with ROMWarez.com.